| Water Slide Decals / Transfers |
|
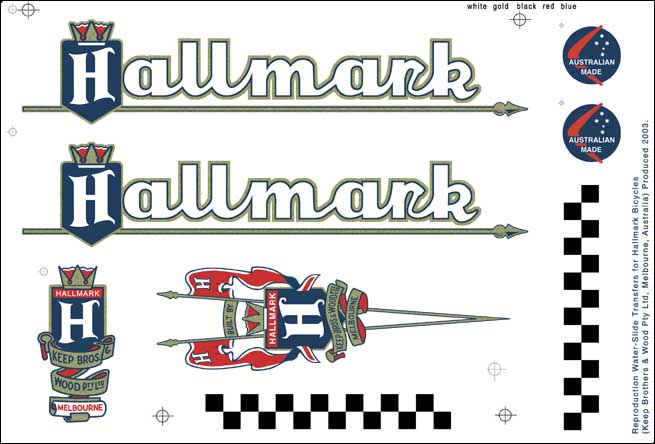
Above: Original and reroduction transfers |
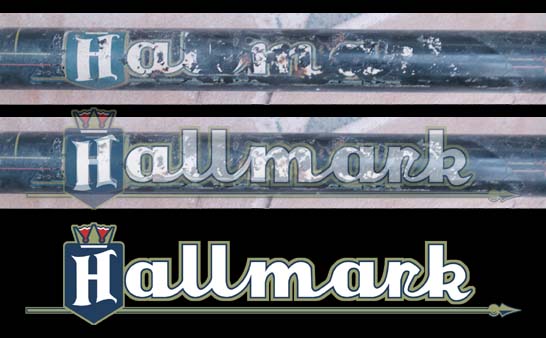
All the transfers on the frame were photographed,
in most cases from three different angles in oder to capture the full image
around the tube.
Once scanned into a computer, these photos were used as a template to "trace" a replica design over the top. In my case I used Adobe Photoshop as this was the tool I had to hand. However, it would have been better to used a vector-based editor such as Adobe Illustrator, or Microsoft CorelDraw, because these were preferred tools that the print-shop used. Below is a sample image, showing:
|
|
 |
 |
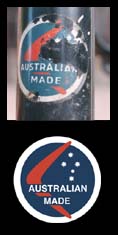
At the left is shown the original
decal on the seat post. The reproduction transfer is beside it, along with
new chequered bands which are placed over the join in the paint-work (where
red-meets-black).
In producing new transfers, there are anumber of options:
To reduce costs I prepared all the artwork, as five "colour-separations" ready for use by the print shop. To do this, the ink-sequence must be known - in my case it was: blue, red, black, gold, white. In additon, "colour-trapping" or "blocking" was incorporated into the artwork. This is the colour overlap required to ensure that positional variations during printing don't result in areas with no ink where two colurs meet each other. |
|
|
final print, metallic-gold ink was used, as per original.
|
| Return to Hallmark restoration
page.
Return to Stephen Spicer's home page. Join the "Roll
Britannia" discussion group on British Roadsters.
|
|
|